Wednesday, August 28, 2013

Kitchen: COUNTERTOPS!!!


The counters were a lovely beige laminate with sharp corners and stained with years of use. We figured it we wanted to redo cabinets we may as well go for counters. This was about the only thing we could not diy. Well technically...we played with the idea of butcher block but once again there was no time to have David make those, you know in his spare time. They were also too expensive to buy, so that was out. We went to our trusty Lowes home improvement store where a man named Gill gave us the lowe-down (haha so puny). We picked out a quartz, put a down payment on them and set up a potential date for the company to come and do the template. But before we could even think about counters there were a number of dominoes that needed placing. 


Counter Tops Before 

First we needed to paint existing cabinets, remove the backsplash and put the wall back in (see post on backsplash), remove peninsula cabinet, replace peninsula cabinet (see pic above), schedule a template, remove old counter top (layer by layer), remove sink, leveled the old cabinets, raised the level to make cabinets tops higher, then leveled again, have appliances arrive before and...thats it. NBD

Removing old counters, laminate first 

our friend Sergey came to help

2 hours later they are all gone

here is a view of the innerds

sink

section between fridge and dishwasher

more to add to our trash pile 


then David added 1/4 inch plywood (i think) to make counters a little taller . Then he made sure everything was level.  The peninsula plywood had to be lowered because it was too tall. 
Then the counter guys came Friday afternoon at 5. We left and watched "Suits" our fav show at the Sheldon house while we waited....

They even installed the sink which came included! 

They made sure there were no flaws 

2 hours later it was done. A Hard nights work for us :) 

They are a quartz called Grey Expo (what else)

We love them, the pictures do not do them justice. We had them do a rounded edge and a 10 inch overhang so we now have a bar hangout! 

It has a slight beveled edge so no sharp edges for me to run into  anymore 

The sink is a brushed stainless double bowl and we got four holes for our faucet pieces

This is why we made sure the counters were level 

Then David signed for it and we jumped up and down so excited to have beautiful new counters!

*Some prep work you didn't see was the appliance delivery. Each kitchen appliance needed some retrofitting. The fridge was too wide, so we had to shave off 1/16th of an inch from a upper cabinet. The range didnt go flush onto the wall so holes were cut in the drywall to submerge outlets. The original counters were too low for the  new dishwasher, which is why David raised the whole thing. 

Monday, August 19, 2013

I Heart 8 inch planks!

We began Saturday morning at 6:30 am. The first order of business was to take our vitamins including a large dosage of vitamin I (ibuprofen). Then to gather the strength to attach the trailer and head to Mugs for breakfast burritos and coffee. (This was the agreement we made in return for the early morning wake up). The vegetarian chorizo burritos were made fresh for us, what a treat! It's the little things.


Then we went to our date place...Home Depot. For yet again another disappointing moment with an employee. To be honest I think my opinion is set so lets just say HD is not my favorite home improvement department store. Anyway our mission for this early trip was to make a trim purchase. 312 feet to be exact. We needed baseboards, casements (those go on windows and doors), and beadboard. This was so I would have the job of painting these items while the Brey men handled the hardwood install...clearly no place for a lady. So we attached the trim to the top of the trailer and headed to Belmar. We met our wedding officient Mr. Aragorn Spaulding and Davids Dad and got to work.  I am not sure of all the details (since I was condemned to womens work) but this time around the install had significant challenges. 

The wood was not click lock like the downstairs but actual planks that needed to be installed with a nailer. Lots of measuring and hammering required to this type of flooring. But thanks to Uncle Jeff we had all the right tools to get the job done. 

Pick up planks and move them out of the way 

Husband!!

"You guys move it because it'll take me longer to recover if I throw my back" - Michael Brey 

8 inches wide! 

Slow but steady process

The nailer and the compression tube from Uncle Jeff 

First you hammer into place then you nail it 

Almost DONE (kinda)

17 hours of work 

It looks incredible, great for sock sliding 

Best ever

Look at the bullnose husband put in

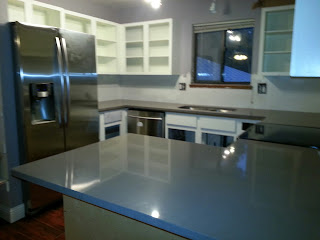
Do you remember what the upstairs looked like before? Here is a reminder


Sunday, August 18, 2013

Kitchen: Road to Backsplash

The backsplash that came with the house was tolerable but we wanted something different. I was given the task of removing the existing tile backsplash. David instructed me to do this carefully - I was to remove the tile without going through the drywall, just tap it off gently. Well...the tiles were not put on very well so the tiles were super hard to remove. I used a crow bar to nick off pieces bit by  bit while my mother-in-law smashed pieces with a hammer to get them loose. Several feet in we were exhausted and had cause several puncture holes in the dry wall. 

Back Splash Before 


Mother-in-law about to attack 
This is when we were trying not to destroy the wall 


Stress relief 
Backsplash DESTROYED 

So now that there is no wall in the Kitchen. We ran across a dilemma, we had to repair the wall before we could get the counter top template (which was happening the next day). So David sent Amanda and I on a mission to go buy "3, 8x5 1/2 inch dry wall concrete board" and "1 and 5/8 dry wall screws." We took a picture to make sure I got the right ones.


The trip to Home Depot was successful. However I am continually unimpressed with customer service there. When we asked where the dry wall was they were like aisle 6 and didn't over to help the 5feet women to get it down off the wall. He finally came over and was like uh do you guy need help. Then he looked at us kinda funny and said "soooo what are you two building...." "were not building anything but my husband needs to put a wall back in." He was very relieved to know we wouldn't be the ones building anything. Then he awkwardly said so I am guessing you'll need help loading this up. BAH YES! It wouldn't have even been a question at Ace "The Friendly Place."   We loaded it into the back of the truck and he warned us to go slow over bumps because the dry wall could crack. Cool Thanks! We made it back to Belmar, almost screaming over every bump and railroad track we drove over. 

Then David measured and cut dry wall pieces and put a wall back in where I had destroyed from Tile Demo. Oh skillful Husband - I am so thankful he knows all these things.


Yay wall is back. Now to fill and the cracks and seams we got to mud again. So we took our spatulas and filled it in. 
 No crack!

  Now is the real challenging part...choosing a backsplash! ah We bought hundreds of dollars worth of tile but then I changed my mind about them and we returned them. (I warned him this might happen). I am torn between a tin or subway tiles. But I didn't want to do white because we just ripped out white tiles. That would be stupid. So I will continue my pinterest research. 

Friday, August 16, 2013

Kitchen: Floors


The first thing we did was demo the kitchen tile floor. But guess what there was wooden underlayment under that (which also had to be pried up)...then guess what there was a layer of old 1970's Linoleum under that! Oh and then there were hundreds over staples that also needed to be pried up one...by one...by one...by one... Which I fearlessly tackled all by my lonesome with only disney tunes and slow 90's jams to keep me company. 

We did our best to document each precious renovation moment. 

hardwork and determination...and a woman with a sledge hammer gets tile flooring out 

awkward...how do we get the wood off the subfloor?

oh you give Michael Brey (father-in-law) a sledge hammer 

then you give the sledge hammer to husband 

keep beating

and beating 


another awkward linoleum situation complete with staples 


staple removal equipment 


damn staples took 4 hours to remove!!!
NOW we are ready for hardwood floors...#boom


Search This Blog